
Appearance
Custom Workflows
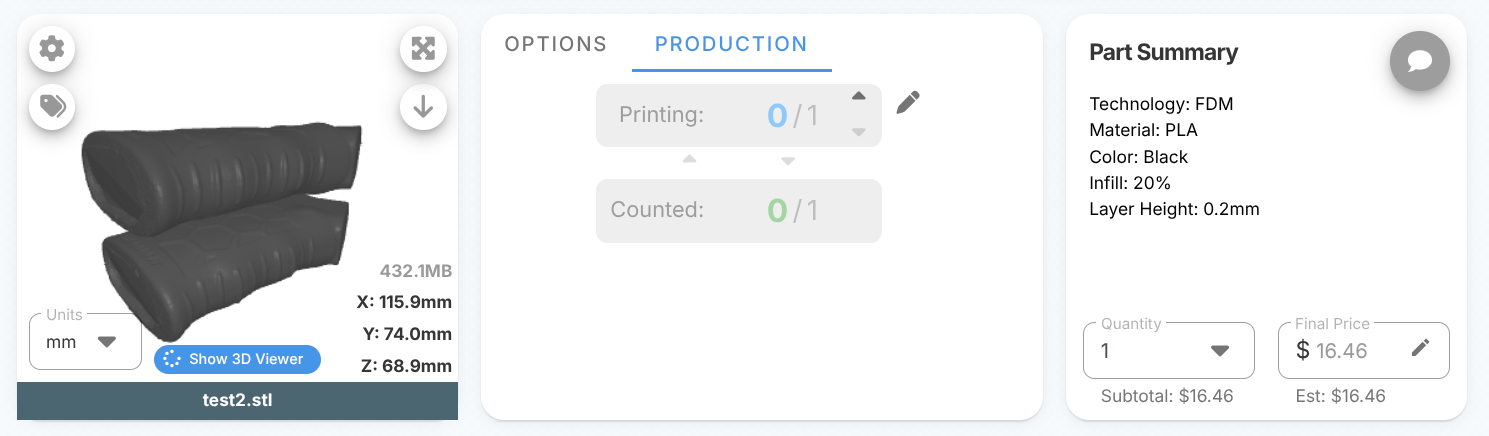
Every part in FormFactories moves through a workflow — an ordered list of stages that describe where it is in production. Out of the box, that workflow has just two stages:
- Printing — the part has been started
- Counted — the part is finished and counted
For a lot of shops, that's all you need. But if your parts go through more than "start" and "finish", you can now define your own stages, setting defaults across Technology, Material, Color, and even adding custom stages on a per-model basis.
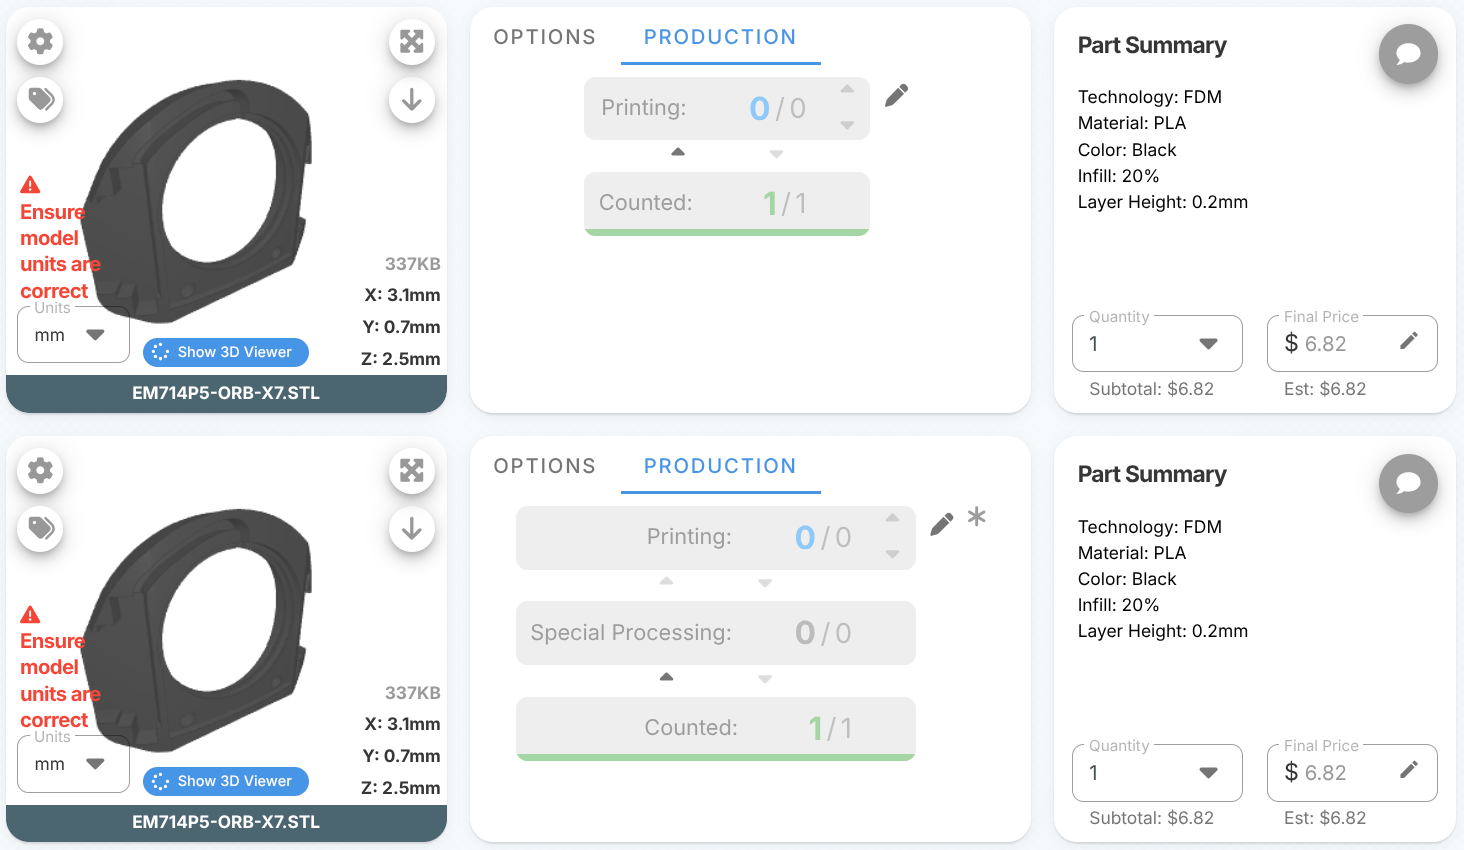
📸 Screenshot: A model in a project showing the default Printing -> Counted workflow.
When to use Workflows
Imagine an SLS part. After it comes off the printer it still has to be de-powdered, dyed, and inspected before it's completed.
Custom workflows let you explicitly track those steps, so a part can sit at "Dyeing" or "QC" and everyone can see exactly where it is. Some examples:
- Resin/SLA: Printing -> Washing -> Curing -> Counted
- SLS: Printing -> De-powdering -> Dyeing -> Inspection -> Counted
- Finishing-heavy jobs: Printing -> Sanding -> Painting -> Counted
The first stage in any workflow always means "started" and the last stage always means "done/counted." Custom workflows allow you to describe the steps in between.
Workflows Settings
Workflows live in the Materials & Capabilities settings page.
- Open the staff Settings menu in the sidebar.
- Choose Materials & Capabilities (the swatchbook icon).
- Scroll down to the Workflows card.
📸 Screenshot: The Materials & Capabilities page with the Workflows card. A workflow override adds the "Cooling" stage to all parts using the SLS technology.
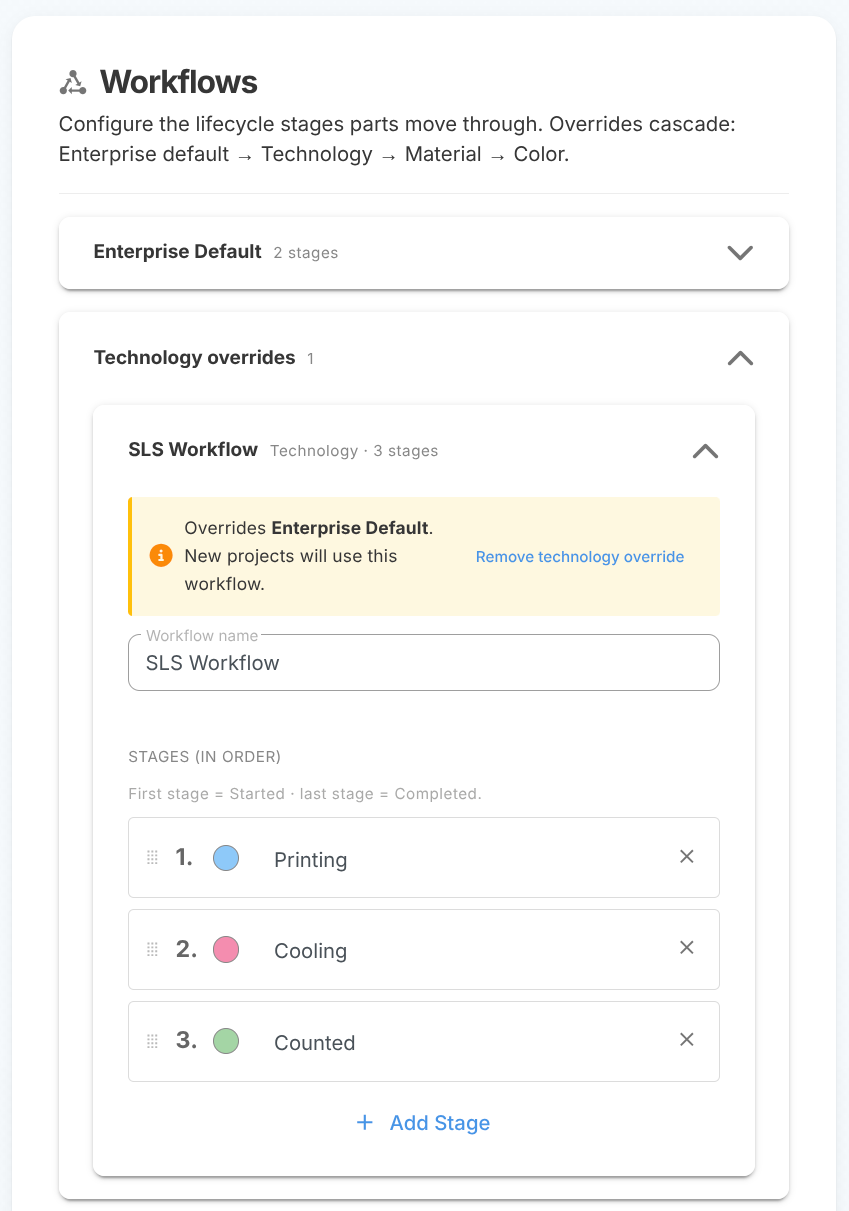
At the top of the card you'll see your Enterprise default workflow. This is the workflow every new part uses unless a more specific rule applies.
Building a workflow
Inside any workflow you can:
- Add a stage and give it a name (for example, "Painting").
- Reorder stages so they match the real order of your process.
- Recolor a stage so it's easy to spot on the dashboard.
- Remove a stage you don't need.
Every workflow needs at least two stages: starting, and finished. By default, these stages are "Printing" and "Counted" as they've always been in Formfactories. To create a new workflow, click the "+ Override for..." button at the bottom of the Workflows settings.
📸 Screenshot: Editing the stages of a workflow (adding, renaming, reordering).
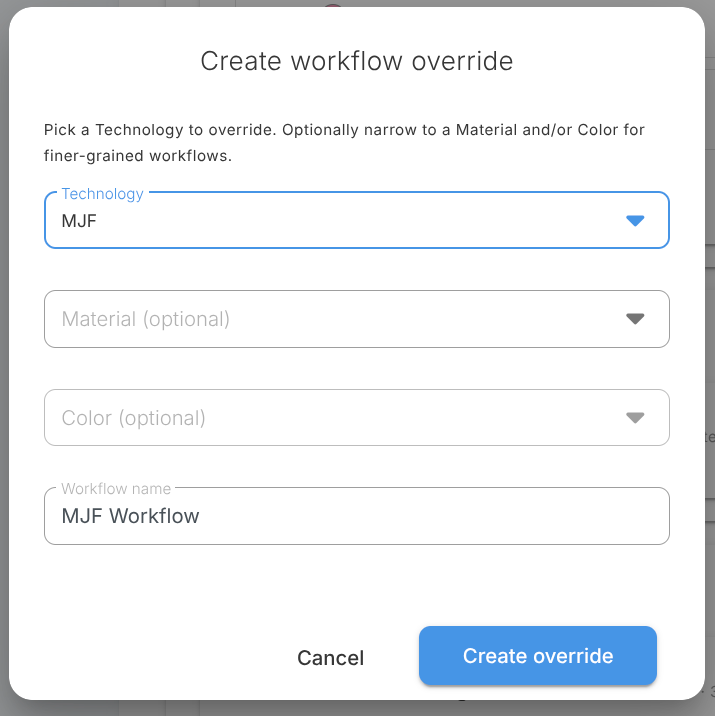
Workflow Overrides
Not every product needs the same steps. A resin part and an FDM part have very different lives, so you can create overrides that apply only to certain products. The Workflows card is organized into expanding sections:
- Technology overrides — e.g. a workflow that applies to everything printed with SLS.
- Material overrides — e.g. a workflow just for SLS / Nylon.
- Color overrides — e.g. a workflow for SLS / Nylon / Black that adds a "Dyeing" step.
These rules cascade from general to specific, and the most specific match wins:
Enterprise default -> Technology -> Material -> Color
So if you have a default workflow and a Technology override for SLS and a Color override for SLS/Nylon/Black, a black nylon part uses the color override; a grey nylon part falls back to the SLS technology override; and a part of some other technology uses the enterprise default.
Existing Projects
This is important: editing a workflow only affects parts created from then on. Projects already in progress keep the workflow they started with.
This means you can refine your process at any time without scrambling the counts on jobs that are halfway done. A part that's already sitting at "Counted" won't suddenly jump backwards because you added a new stage.
Update Project Workflows
If you do want an older project to use your newest stages, you can update it model-by-model. On a model, look for the pencil icon next to its workflow — click it to open the workflow editor for that one model, then choose Reset to latest workflow.
📸 Screenshot: The edit dialog for a model's workflow. You can reset the model's workflow to the default here.
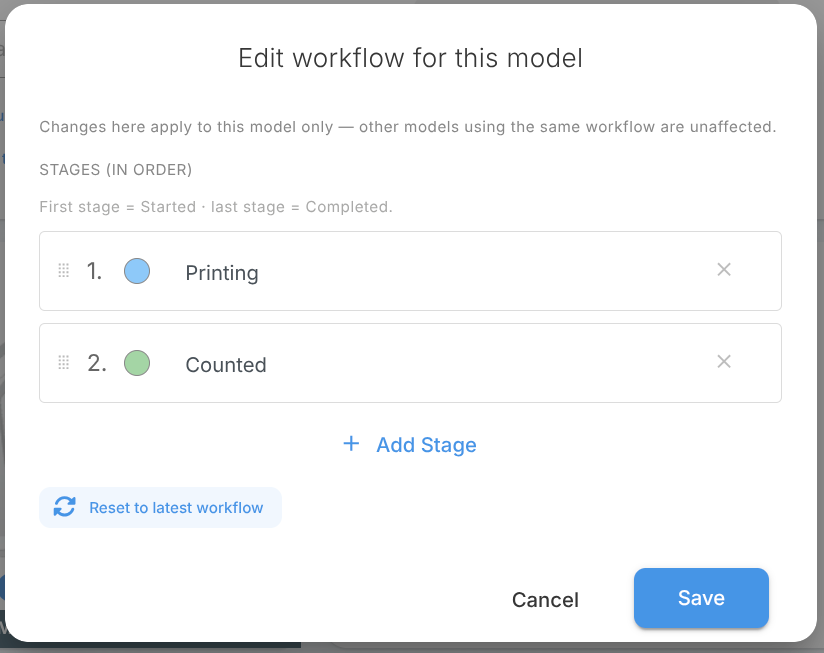
The pencil also shows a small asterisk so you can tell a model's workflow apart at a glance:
- An asterisk (*) means this model has a custom workflow — it's been hand-edited and is intentionally different from the standard one.
- A broken-link icon (orange) means this model is out of sync — the standard workflow for its product has changed since this model was set up, so it may be worth resetting it to the latest.
Model-specific Workflows
Sometimes a single project is unusually involved — maybe one model needs an extra step that none of your other work requires. You don't have to create an enterprise-wide workflow for that.
Instead, use the same pencil icon on that individual model and add the extra stage there. The change applies to only that model, leaving every other part and your enterprise settings untouched. The model will show the asterisk badge to remind you it's a custom, one-off workflow.
This keeps your enterprise settings clean and standard, while still letting you handle the occasional special job.
📸 Screenshot: Models can have one-off extra stages without needing to change the enterprise settings.
Dashboard Filtering
Once your parts are moving through real stages, you can filter through the dashboard by them. In the dashboard filters, open the Stages filter and pick one or more stages — for example, show only parts currently at "Cooling", or everything still in "Printing".
📸 Screenshot: The Stages filter on the dashboard, with custom stages selectable.
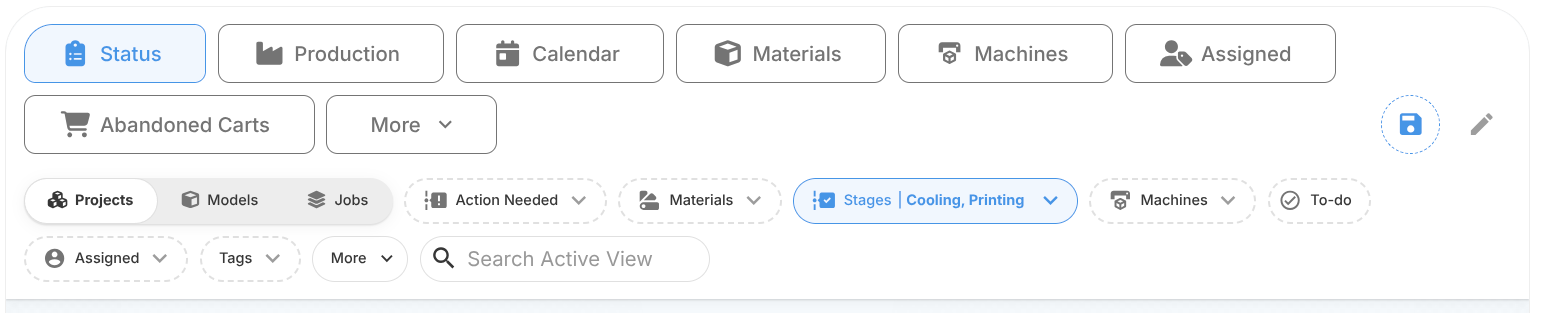
The built-in Printing and Counted stages are always available here too, so older projects that pre-date your custom workflows still show up when you filter by those.