
Appearance
Setting Up Your Factory
This guide covers the basics of setting up Formfactories for your organization.
Materials and Capabilities
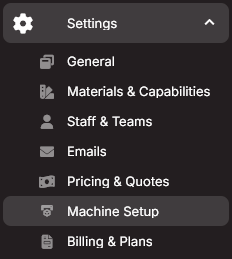
Let's set up your technologiesThe process used by a machine (FDM, SLA, laser cutting, etc.) to create models., materialsThe physical material used to create a model (PLA, ABS, resin, etc.)., and propertiesAnything about a model that isn't the technology or material (layer height, infill, post processing, etc.).. In the sidebar, navigate to Settings > Materials & Capabilities.

Add Your Technologies
Select from the common technologies available, or click the Add New Technology button to create your own.
Add Your Materials
Any new technology will be disabled until you add materials to it. To add a material, click on the technology in the list to configure it.
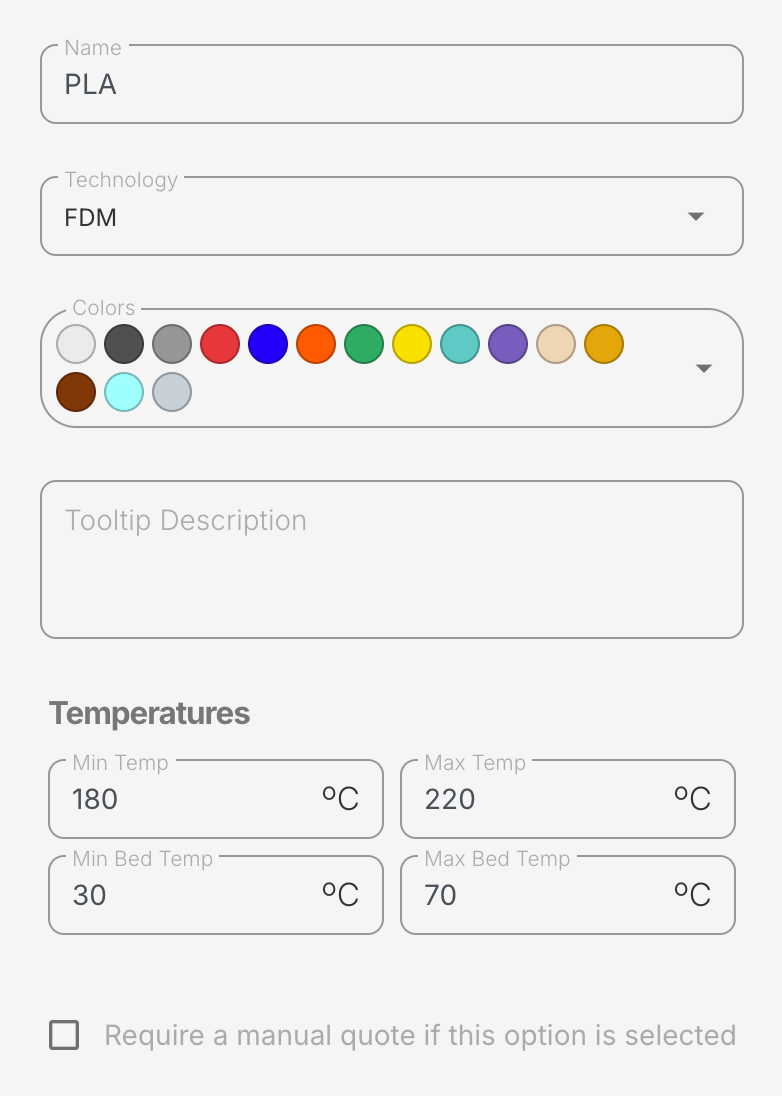
Next, click Add New Material. Here, you can set the name, color options, description, temperature properties, pricing options, material properties, and more.
Hiding Materials
You might want to hide less commonly used materials to avoid overwhelming customersAny non-staff user of the platform. These are the people your factory serves. Also called 'clients'.. Note that staff membersAny user with staff permissions in the platform (set in the Staff and Teams section of Settings). These are the people who manage the factory and its operations. will still be able to see all materials and properties, even if the customer cannot.
Add Your Properties
The last part is potentially the most complex. Note that you can come back to this part anytime, as you will likely need to put a lot of thought into it. Let's add your propertiesAnything about a model that isn't the technology or material (layer height, infill, post processing, etc.)..
A property is anything that isn't a technology or material.
These are things like infill, layer height, finishing options, or, again, anything that isn't a technology or material. You can pick out common properties from the platform, or make your own custom ones by clicking +Add New Property at the bottom of the list.
Add your Options
When you hover over a property name, you'll see a gear icon. Clicking this will allow you to add options.
Limit Available Options
Most of the time you'll want to limit the available options. Nozzle size, for example, might be limited to 0.2mm, 0.4mm, 0.6mm, and 0.8mm. If you don't limit the options, you're opening the door for customers and staff to type in anything they'd like.
Limit Option Visibility
You might not want your customers to see all of the same options your staff members see, as that could make for an incredibly complex input form, and the customers might not understand the more advanced options.
To adjust the option visibility, click the gear icon next to the option name to open the same window used to add options to a property. From there, you'll see another gear icon for Settings.
- Decide if customers can view the option.
- Decide if customers can edit the option, which gives them the ability to choose whatever compatible options you have set up (like an infill value, for example).
- If you're worried the option needs more explanation, you can add a tooltip to the option. This is a great way to explain what the option does, or why it might be useful.
Request/Require Additional Information
This window is also where you can request or require additional information. For example, if they choose custom paint, you might require they then describe the colors and give them a text field to do so.
Limit Property Compatibility with Other Properties
Not all properties, and their options therein, are compatible with each other. For example, you might not want to allow a customer to select a 0.2mm nozzle size with a 0.6mm layer height. For those cases, you can click the edit icon (the pencil icon) to the right of an option name. This will open a window where you can limit the compatibility of that option with other properties.
Machines
Let's add your machines under Settings > Machine Setup.
Click the New Machine button at the top of the menu.
Machine Types
A Machine Type is the make and model of a machine, such as a Bambu X1 Carbon or an Anycubic Photon Mono. This is also where you assign the technology of the machine.
Number of Instances
This is the number of machines of that type that you have.
Max Build Volume
Self explanatory, but put here for completeness.
Job File Matching
This allows you to narrow down the options the software will use when matching job files to machines. For example, a .form file might only be compatible with your Formlabs machines, so you would input .form into the Print Job File Extensions field. Print Job Identifiers can further fine tune this matching process by having the software scan the job file as best as it can for specific strings that indicate which machine the job file is meant for. For example, if your slicer always includes a line like MACHINE_TYPE: SuperPrinter3000 in the job file, you can add SuperPrinter3000 as a Print Job Identifier.
Maintenance Schedule
It's never too soon to set up your routine maintenance, and this is where you do that. Click + Add Maintenance Item, give it a name, set the frequency, and add a description or any needed documentation.
Staff Members and Teams
Add Staff Members
To add Staff Members, go to Settings > Staff & Teams, and click + Add Staff Member. Do not make them an owner unless you are ok with them having full control over everything.
Create Teams
Next, under the Teams section, click + Create New Team
A team can be any group of people you'd like, and for any purpose. For example, you might have a sales team, a production team, or a maintenance team. Teams are also essential for setting permissions (more on that below)
Pro Tip
If you create a team for John's surprise birthday party, make sure not to add John.
Ping People
Now that you have staff members and teams, you can ping them with the @ symbol from any chatroom. There's a lot more that you can do as well, which we'll cover throughout the guide.
Set Permissions
Teams need to be established for permission to be granted, so by default your staff memembers might be quite limited in what they can do or see.
Granting permission to view or edit certain things is done, using Teams, under General > Settings.
One of the fastest ways to do this is to use the Find feature in your browser (usually Ctrl+F or Cmd+F) to search for "teams". This will take you to the various applicable sections, which include (in this order):
- Teams to Notify of Messages (from customers)
- Teams to Notify of Flagged Messages (inappropriate content)
- Teams with permission to edit machines
- Teams with permission to edit technologies, materials, and addons
- Teams with permission to send emails to clients
- Teams that can archive projects
- Teams that are shown project prices & totals
- Various inventory notifications
- Various workspaces permissions (advanced, not needed for most users)
- Teams with permission to edit store products
- Teams with permission to edit inventory items and categories
- Teams with permission to view/export client list (none by default)
Set Up Pricing
We have a separate guide for setting up pricing, which you can find here. However, you cannot set up pricing until you have created a project and understand your way around one. This brings us to the next section.
Create a Project
Congratulations, you're ready to start creating projectsA collection of parts, quantities, materials, job files, client information, and pricing (if applicable)., the backbone of Formfactories. We'll continue this over at Creating Projects.