
Appearance
job file
A file that gets sent to a machine to make a model (like a .3MF, .gcode, etc.).
Linking to Models
Upload a job file to a project by dragging and dropping it in, or using the Upload Files button at the bottom.
If 3D models have already been uploaded to a project, you will be asked to specify the quantities of each model that the job file represents.
Pro Tip
You can also select models from other projects using the Select From Other Projects button (for situations where a job file contains models from multiple projects). Linked models can be edited anytime, so don't stress about getting it perfect upon upload.
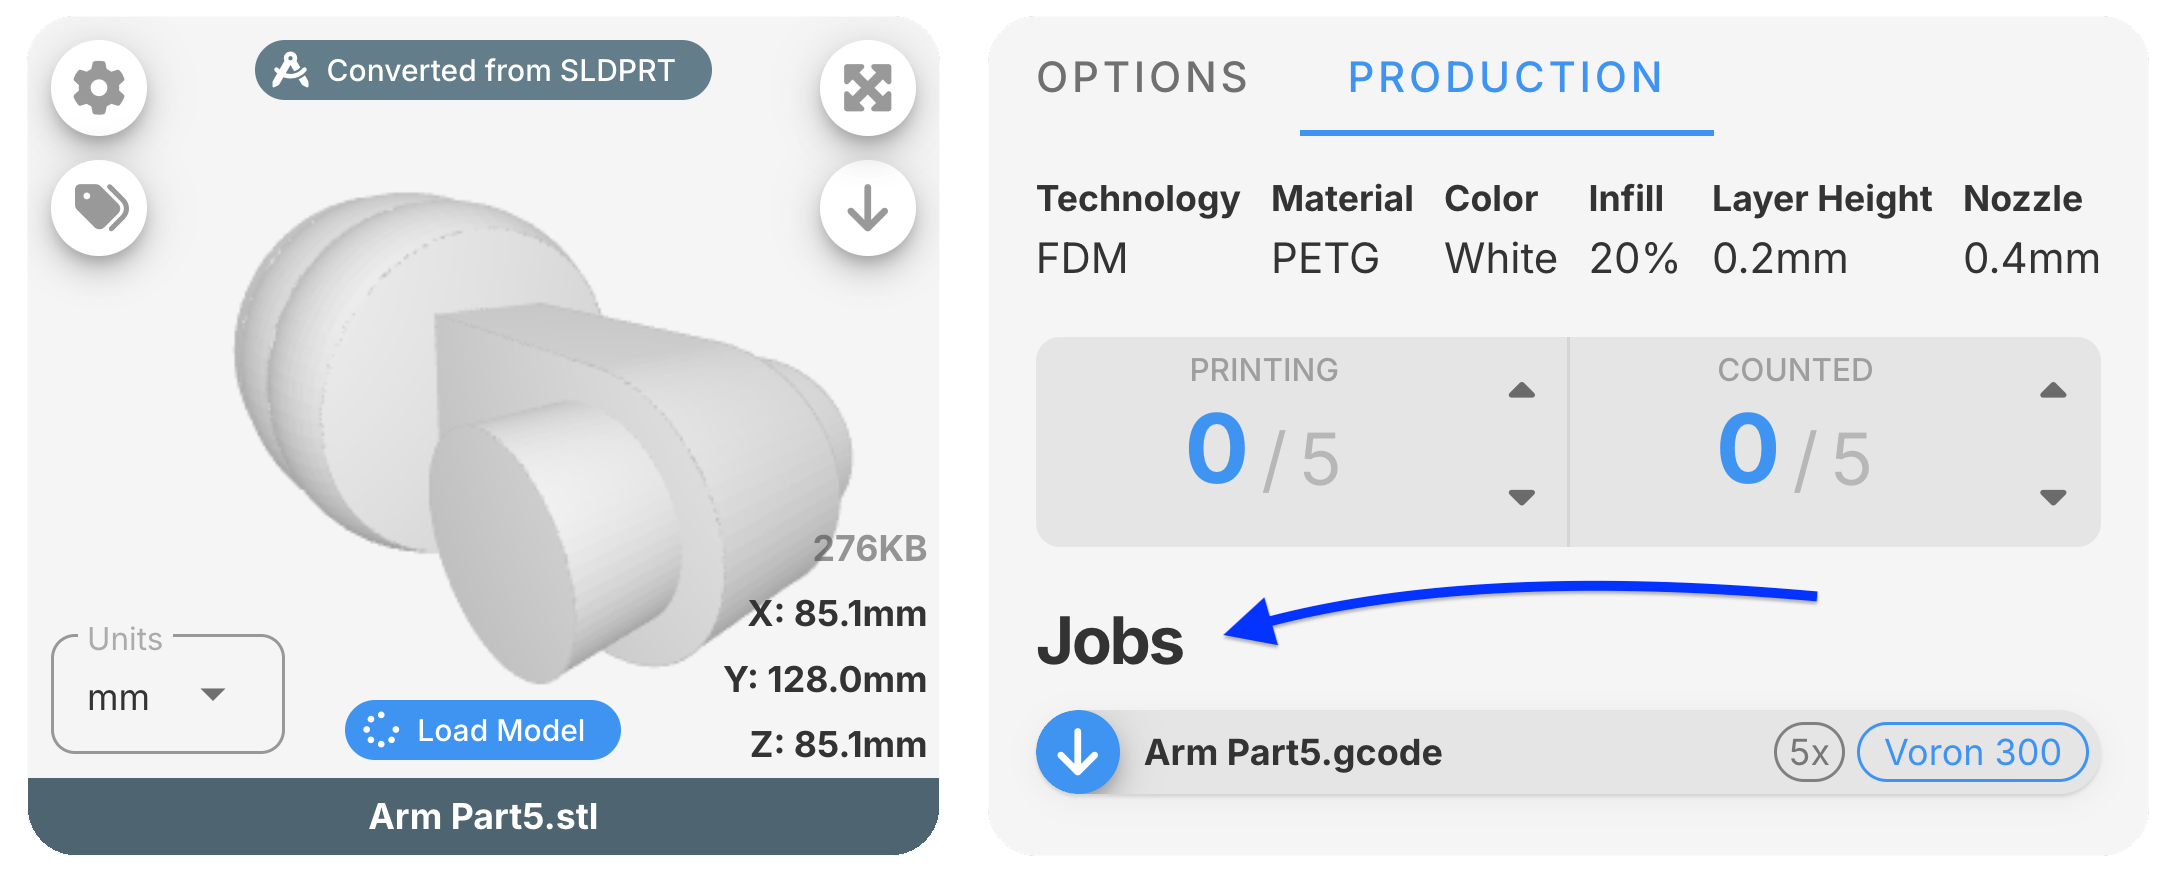
Once uploaded, a job will appear at the top of the project, under the Jobs tab.

It will also appear as quick download link under the corresponding models.
Linking to Machines
After uploading a job file, you can select which machine it is intended for. Or, you can automate this process by setting up Job File Matching and/or Print Job Identifiers.
Pro Tip
Linking to machines is optional — but it’s super useful. In addition to letting your team know which machine a job is meant for, it also unlocks helpful dashboard features like filtering and sorting by machine type.
Job File Matching
If a file extension is only used as a job file for a specific machine (like a .form file for a Formlabs printer), you can set up Job File Matching and you'll be good to go.
For situations where a file extension is used for multiple machines (like a .gcode or .3mf), you can add a Print Job Identifier.
Print Job Identifiers
These are special words or phrases the software looks for inside a job file after you upload it. If it finds one, it will automatically know which machine the file is meant for.
For example: If your slicer always includes a line like MACHINE_TYPE: SuperPrinter3000 in the job file, you can add SuperPrinter3000 as a Print Job Identifier.
You can add more than one—just separate them with commas. Capital letters don’t matter.
INFO
To set up Job File Matching and/or a Print Job Identifier for a machine: Go to Settings > Machine Setup, then click the Edit button next to the machine type you want to update.
Mark Printing or Counted
Every model will give a live update of the QTY that is being printed or counted, which is essential for teams to track production progress. Those numbers can be adjusted manually. Or, convientely, you can mark a job file as printing or counted, and all of the corresponding parts across all of the projects will be updated instantly.
In this visual, you'll notice the job file base x.gcode contains QTY 4 of the model base x.stl (printing this will result in QTY 4 of that part being produced).